Building Requests
The center panel is the request editor. At the top is the request bar — the method, the URL, and the Send button. Below it, a row of tabs lets you add query parameters, headers, a body, authentication, and post-response captures.
Edits save automatically. There is no Save button or shortcut — every change you make is written to disk a moment after you stop typing, so your work is always persisted and there's no unsaved state to lose.
The request bar
Method
Click the method button on the left to choose the HTTP verb:
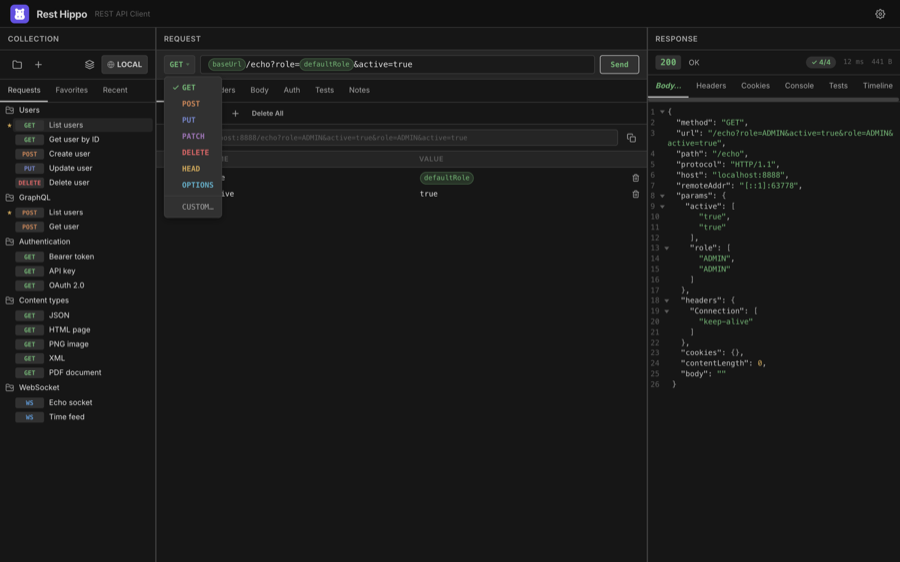
Rest Hippo supports GET, POST, PUT, PATCH, DELETE, HEAD, OPTIONS, and a
Custom… option for any non-standard verb your API expects.
URL
Type the request URL into the bar. You can drop
{{variables}} anywhere in it — for example
{{baseUrl}}/users/{{userId}}. When Show URL preview is on (Settings →
Appearance), Rest Hippo shows the fully-resolved URL directly beneath the URL bar,
so you can confirm exactly what will be sent.
Press Enter in the URL bar to send the request, or click Send. While a request is in flight the button becomes Stop — click it to abort.
Send type
An icon to the right of the word Send shows how the button fires. Click the caret beside it to open a menu of the three types (the active one is check-marked); the choice is a global default that applies to every request:
| Type | Icon | Behavior |
|---|---|---|
| Immediate | (none) | Fires the request as soon as you trigger Send (the default). |
| Delayed | stopwatch | Waits the Delay you set, then fires once. |
| Interval | recycle arrows | Waits the Interval, fires, then waits the interval again each time a response lands. |
Choosing Delayed or Interval opens a small dialog under the Send button with a single field for that type's timing — a delay for Delayed, an interval for Interval. Defaults are a 5-second delay and a 10-second interval. To adjust the timing later, right-click the Send button while it's in Delayed or Interval mode to reopen that same dialog — available only while no countdown is running.
Every trigger — clicking Send, pressing ⌘/Ctrl+Enter, or double-clicking the request in the tree — runs the active type.
While a delayed or interval countdown is ticking, the button reads Cancel and a colour sweep drains across it as the timer runs down; click it to cancel the timer and return to Send. Switching to another request also stops the countdown.
Query parameters
The Params tab edits the query string as an editable key/value grid. Rest Hippo keeps it in sync with the URL — editing one updates the other.
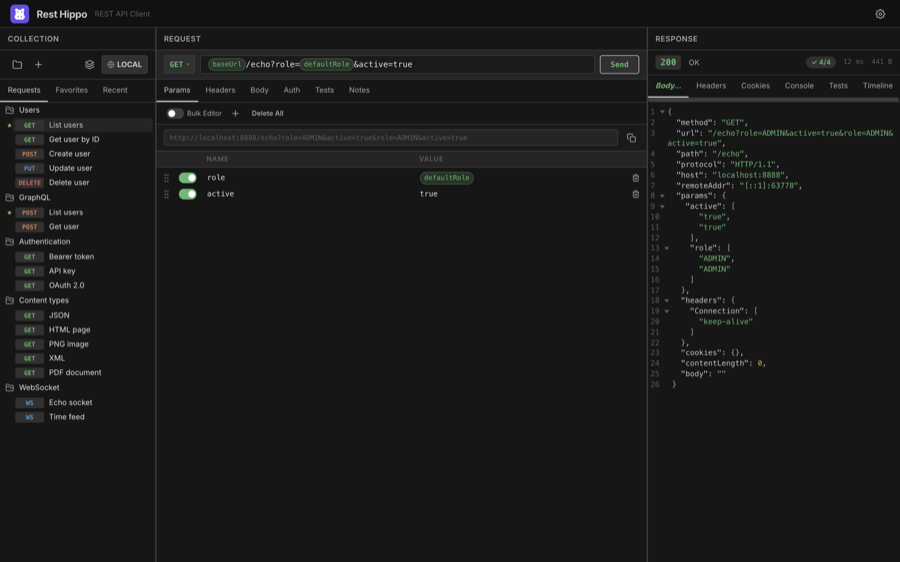
- Each row has an enabled toggle, a name, and a value. Disabled rows are kept but not sent.
- Both name and value accept
{{variables}}. - Use + to add a row, the trash icon to remove one, and Delete All to clear them.
- Toggle Bulk Editor to edit all parameters as plain text instead of rows — handy for pasting.
Headers
The Headers tab works the same way — an enabled/name/value grid with a bulk text mode.
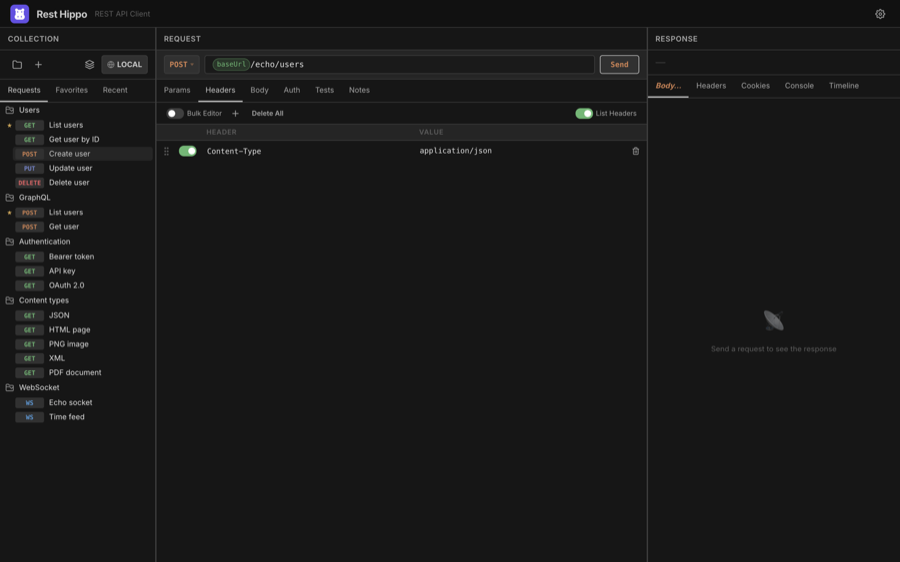
As you type a header name, Rest Hippo suggests standard header names
(Content-Type, Authorization, Accept, …). Values accept {{variables}}.
Some headers are managed for you. When you choose an authentication type, the matching
Authorization(or custom) header is added automatically at send time.
Inheriting collection default headers
A collection can define default headers applied to every request in it (set them in the Collections editor → Headers tab). When a request has a header row of the same name, how they combine depends on the value — by presence, the same way profile overrides work:
- Blank value → the request inherits the collection default; the value box hints “Inherits collection default”. This is why a header imported from an OpenAPI/Swagger spec with no example value doesn’t wipe out your default — it simply falls back to it.
- A value you type → overrides the default for this request.
- Cleared after editing (an explicit blank) → suppresses the default so nothing is sent; the hint shows “Collection default suppressed”, struck through. The reset button (↺) on the row drops the override and returns the row to inheriting the default.
(Disabling a row with its checkbox also suppresses its collection default, just for that request.)
Request body
The Body tab lets you choose a body type from the dropdown and edit it:
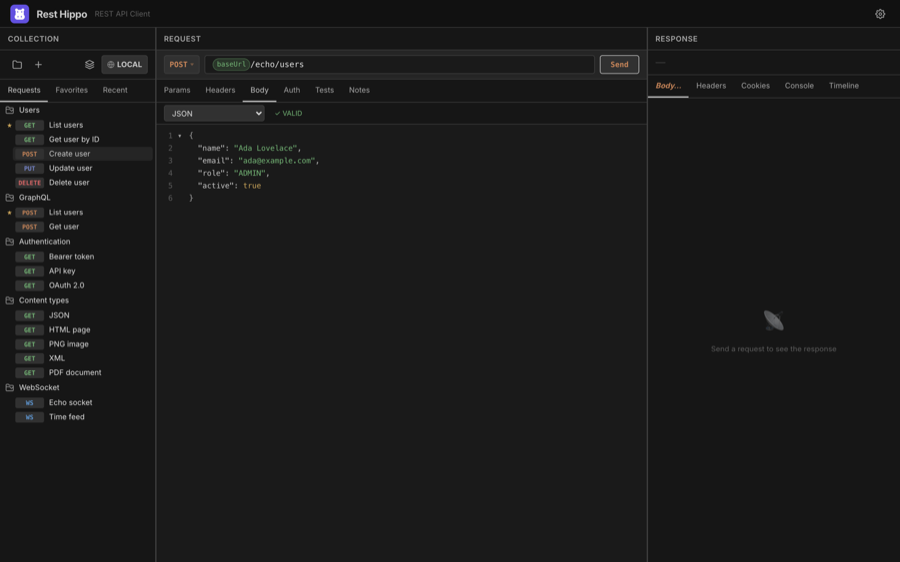
| Body type | Use it for |
|---|---|
| No Body | GET/HEAD and other bodyless requests |
| JSON | application/json payloads, with syntax highlighting and validation |
| YAML | YAML payloads |
| XML | XML payloads |
| Plain Text | Any raw text |
| Form Data | multipart/form-data — key/value fields, each Text or File |
| Form URL Encoded | application/x-www-form-urlencoded key/value pairs |
| GraphQL | A GraphQL query + variables |
| File | Send a file's raw bytes as the body |
For the structured editors (JSON / YAML / XML), Rest Hippo shows a ✓ VALID /
✗ INVALID badge as you type. When the body is invalid, the badge spells out
the reason — the line and column plus the parser's message (e.g.
3:12 Unexpected token) — so you know exactly what to fix; the full text is
also on the badge's tooltip. The code editor has line numbers and a resize
handle, and its right-click menu offers Prettify and code folding.
{{variables}} are highlighted inline and resolved at send time.
The Form Data and Form URL Encoded editors use the same key/value grid as Params and Headers, with a bulk-text mode. In Form Data, switch a row between Text and File to attach a file.
Authentication & captures
Two more tabs round out the request:
- Auth — attach credentials (Bearer, OAuth 2.0, …).
- Captures — pull values out of the response into variables for later requests.
There's also a Notes tab for free-form Markdown notes attached to the request.
Tests
The Tests tab attaches assertions that validate the response after every send — a no-code way to turn a request into an API smoke test. (Enable it under Settings → Request → Show Tests tab; it's off by default.)
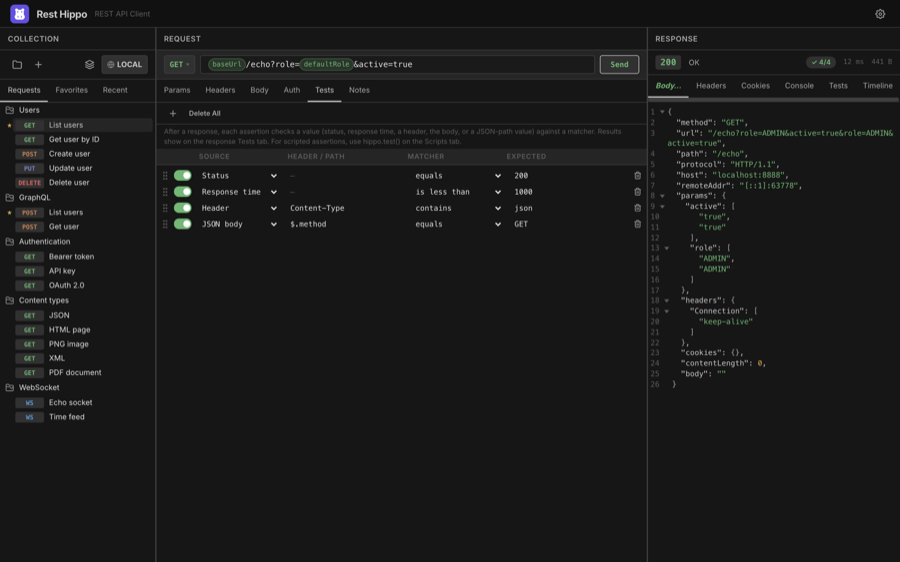
Each row is one check:
- Source — what to look at: the Status code, the Response time (ms), a
Header, the raw Body, or a JSON body value (give a path like
$.data.idin the Header / Path column). - Matcher — how to compare: equals, does not equal, contains, does not contain, exists, does not exist, is less than, is greater than, or matches (regular expression).
- Expected — the value to compare against (ignored for exists / does not exist).
Rows have the familiar enabled toggle, drag-to-reorder, and delete controls.
Results show on the response Tests tab with a pass/fail
badge, and are saved with each run so the Timeline shows whether a past run
passed. For checks that need logic, write
hippo.test() assertions on the Scripts tab —
they run alongside the grid and share the same Tests tab.
Next: Authentication →